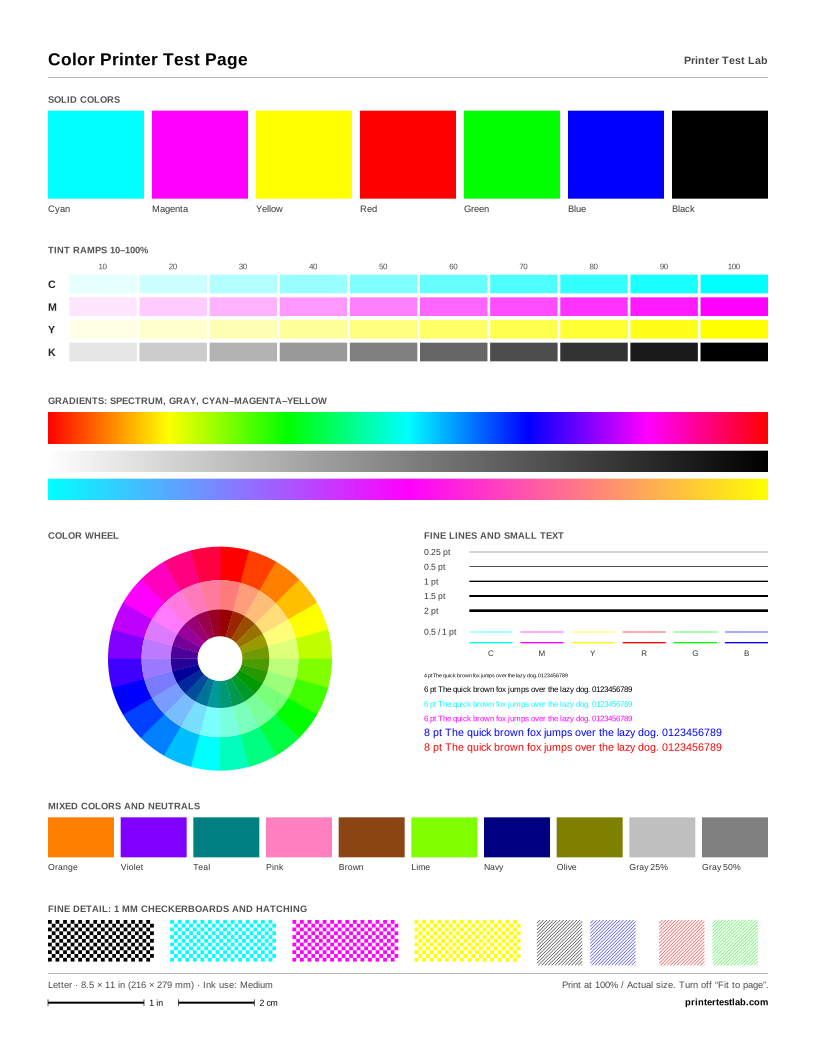
A printer test page is a quick way to see what your printer is really doing. One sheet shows whether every ink or toner is printing, whether fine lines and small text come out sharp, and whether the page prints at the right size. Pick a sheet above, print it at 100% scale, then compare it with the examples below.
What a printer test page checks
Each test page is built from shapes that expose a specific fault. Solid blocks show gaps and streaks, ramps show how well the printer handles light and dark tones, and hairlines show whether the print head is aligned. Between them they check:
- Every ink or toner channel. Cyan, magenta, yellow and black each get their own areas, so a weak or empty channel is easy to spot.
- Nozzles and banding. Large even areas reveal the thin light lines that partly clogged inkjet nozzles leave behind.
- Alignment. Fine lines and small text turn fuzzy or doubled when the print head is out of alignment.
- Tone and gradients. Gray steps and smooth gradients show whether the printer keeps detail in shadows and highlights.
- Text sharpness. Text from 4 to 24 pt shows the smallest size your printer can still render cleanly.
- Scale and paper feed. The 1 in and 2 cm bars at the foot of every sheet should measure exactly. If they don’t, the print dialog scaled the page or the paper is slipping.
- The path from your device to the printer. If the page prints at all, the connection, driver and printer are talking to each other.
What a test page can’t tell you
A test page shows symptoms, not exact measurements. It can’t report how much ink is left in a cartridge; your printer’s software or display does that. It isn’t a color proof either: your browser sends RGB data to the printer, and the on-screen CMYK swatches are approximations. Our CMYK PDF stores true CMYK values, but the printer driver still decides how its inks are mixed. Finally, if one specific program refuses to print while the test page works, the fault lies with that program or its settings, not with the printer.
Which test page should you print?
Start with the standard color page if you’re not sure. If you already know what’s wrong, this table points you to the sheet that shows it best.
| What you notice | Print this | Why |
|---|---|---|
| Colors look wrong, or one seems missing | Color test page, then the single color page for that ink | Isolates each ink so you can see which one fails |
| Thin light lines across the print | Nozzle pattern (Alignment & Nozzle tab), then a purge sheet | Hairlines show clogged nozzles; solid color helps clear them |
| Text looks fuzzy, doubled or jagged | Black and white text page and the alignment grid | Small text and straight lines expose misalignment |
| Prints come out too small or cut off | Scale ruler page (Alignment & Nozzle tab) | Squares and rulers show exactly how the page was scaled |
| The same mark repeats down every page | Laser printer test page | An even gray field and rulers let you measure the repeat |
| Gray photos look blotchy or posterized | Grayscale ramp and gradient pages | Steps that merge show where detail is lost |
| An inkjet hasn’t been used in weeks | Low-ink color page, then a purge sheet if needed | Wakes up every channel without wasting ink |
| A sublimation printer before a job | Sublimation purge sheet | Runs ink through every channel on plain paper |
How to read your results
Let the page dry for a minute, then look at it in daylight or under a bright white lamp. Yellow, light grays and hairlines are hard to judge under warm indoor light. Compare your sheet with these examples:
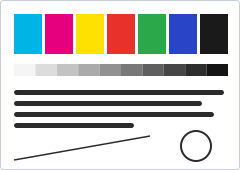
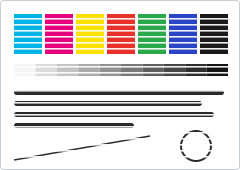
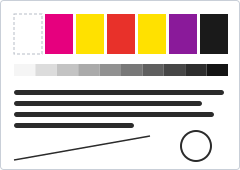
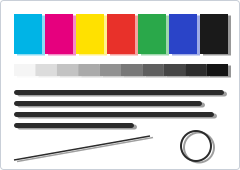
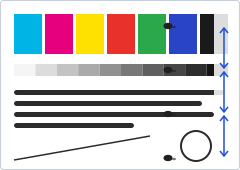
Banding: thin light lines across the page
Banding on an inkjet almost always means some nozzles are partly clogged, so they skip lines as the head moves across the paper. Run your printer’s head cleaning or nozzle check from its menu or software, then print the test page again. If the lines remain after two cleaning cycles, print a purge sheet for the affected color rather than running more cleanings back to back; each cycle uses ink. On a laser printer, light bands usually point to low toner or a worn drum.
A color is missing or looks wrong
When one channel prints nothing, every color that depends on it changes: without cyan, greens look yellow and blues look purple. Check that the cartridge is seated, that any protective tape is gone and that the ink level isn’t empty. If the cartridge is fine, the nozzles for that color may be blocked. Print the single color page for that ink to confirm, then clean or purge.
Blurry or doubled print
If text and fine lines appear twice with a small offset, the print head is out of alignment. Most inkjets have a print head alignment option in the printer menu or in the maker’s software; it prints a pattern and adjusts the timing. Paper that’s too thin or damp can also smear lines, so try fresh plain paper.
Marks that repeat down the page
Spots or smudges that repeat at the same distance come from something that turns: a roller, a laser printer’s drum, or its fuser. Measure the gap between two marks and compare it with the repeating defect table in your printer’s manual or the maker’s support site. It tells you which part is involved. The laser printer test page has rulers on both sides for this.
When everything looks right
Solid areas are even, every gray step is a little darker than the last, small text is readable and the 1 in bar measures one inch. Your printer is fine. If prints from one program still look wrong, check that program’s print settings, especially paper size, quality and color mode.
Not sure what you’re looking at? Pick what your sheet shows here, or open the full printer problem diagnosis for step-by-step help.
Print your printer’s built-in test page
Your computer’s driver and the printer itself can also print a test page. That page mainly proves the connection works; ours shows print quality in more detail. Printing both is a quick way to tell a connection problem from a quality problem.
Windows 11 and Windows 10
In Windows 11, select Start > Settings > Bluetooth & devices > Printers & scanners, select your printer, choose Printer properties, and on the General tab select Print Test Page. In Windows 10 the path is Start > Settings > Devices > Printers & scanners, then select the printer and choose Manage > Printer properties. Source: Microsoft Support. More detail and fixes are in our guide to printing a test page in Windows.
Mac
Open Print Center from the Utilities folder inside Applications, select your printer in the sidebar, then choose Printer > Print Test Page. Source: Apple Support. Whether this command does anything depends on your printer’s driver; if it isn’t available, print one of our pages instead. See our Mac test page guide for older versions of macOS.
Chromebook
ChromeOS doesn’t have a test page command. Open this page, press Ctrl + P, open the Destination menu, choose your printer (use See more if it isn’t listed) and select Print. Chromebooks print to network and USB printers, not over Bluetooth. Source: Chromebook Help.
iPhone and iPad
iOS has no built-in test page either, but AirPrint works with this site. Open this page in Safari, pick a sheet and tap Print now; when the print screen appears, tap No Printer Selected, choose your printer and tap Print. Your printer must support AirPrint and be on the same Wi-Fi or wired network. Source: Apple Support.
Android
Android prints through print services. On a Pixel phone you’ll find them in Settings > Connected devices > Connection preferences > Printing, where you can turn a service on or add one; menu names can differ on phones from other manufacturers. Then open this page in Chrome and tap Print now. Source: Pixel Phone Help. Google Cloud Print, which older guides still mention, stopped working at the end of 2020.
From the printer itself
Most printers can also print a status report, configuration page or nozzle check from their own control panel, with no computer involved. If that page prints cleanly but jobs from your computer don’t, the printer is fine and the problem is the connection or driver. The steps differ by maker and model; see our pages for HP, Epson, Canon and Brother printers.
Inkjet vs. laser: what the test page shows
The same sheet tells a different story on each type of printer. An inkjet sprays tiny drops from rows of nozzles, so its typical faults are banding, missing colors after the printer sits unused, and misalignment. Ink on plain paper also spreads slightly, so the smallest text and hairlines look softer than on a laser.
A laser printer fuses toner powder onto the paper with heat. It rarely clogs, but its rollers and drum wear out. Look for streaks that run the length of the page, marks that repeat at a fixed distance, a light gray haze in white areas, faint “ghost” copies of the page, and toner that smudges when you rub it. The laser printer test page is designed to show exactly those.
Tips for an accurate test print
- Print at 100%. In the print dialog, set Scale to 100% or Actual size and turn off Fit to page or Fit to printable area. Otherwise the scale bars won’t measure correctly.
- Match the paper. Choose Letter or A4 to match the paper in the tray, and plain paper as the paper type.
- Use normal quality. Draft or “ink saver” modes make any printer look faded. Test at the standard setting first.
- Give it a minute. Fresh ink looks darker and smears easily, so let the page dry before you judge colors or rub the toner.
- Change one thing at a time. After a cleaning cycle, a new cartridge or an alignment, print the same sheet again so you can compare like with like.