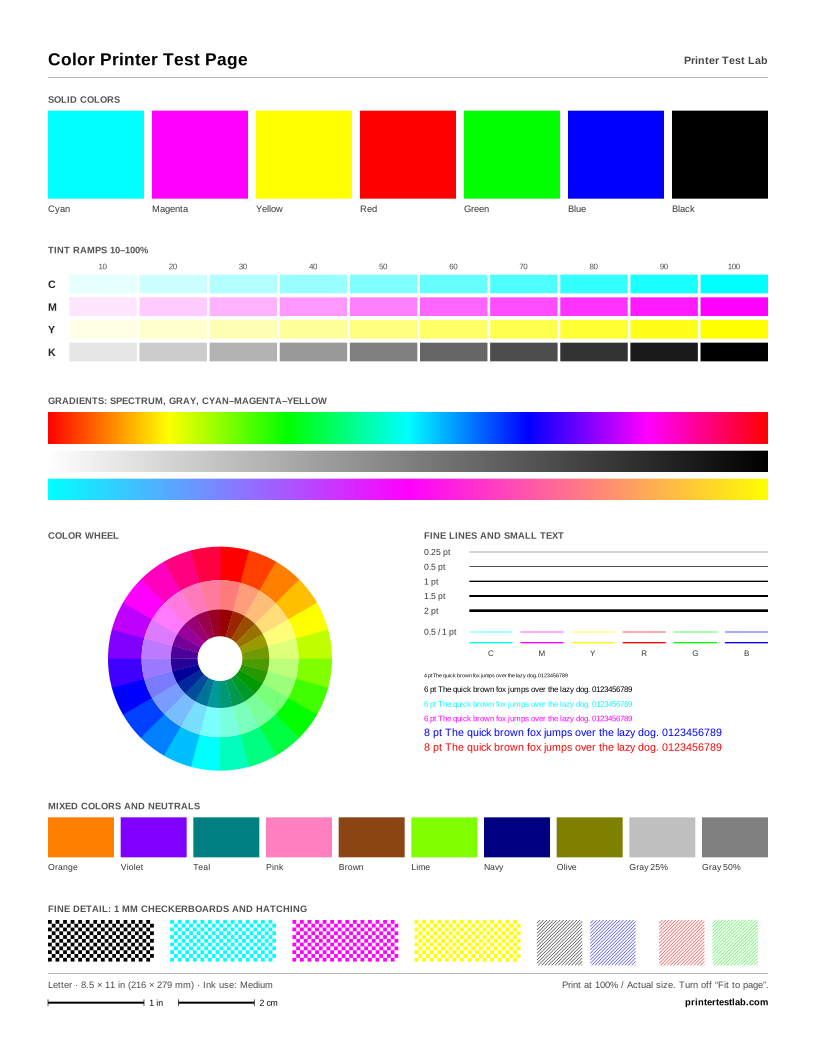
Print Test Page on Mac is a command in Print Center, the app macOS uses to manage printers and print jobs. It sends a simple page to the printer to confirm that your Mac can reach it. This guide covers current and older versions of macOS, manufacturers’ utilities, and what to do when nothing prints. The tool above lets you print a full quality test page from Safari at any time.
Print a test page on Mac with Print Center
On macOS Sonoma 14 and later, Apple’s steps are short (Apple Support):
- Open Print Center. It’s in the Utilities folder inside Applications; you can also open it from Spotlight.
- Select your printer in the sidebar.
- Choose Printer > Print Test Page from the menu bar.
Print Center also opens by itself when you send a print job, and while something is printing its icon in the Dock shows the number of jobs in the queue. From the same window you can pause, resume or delete jobs, add or remove printers, and open Options & Supplies for the selected printer.
If Print Test Page isn’t available for your printer, print one of our pages from Safari instead. It travels the same way as any document, through the same queue and driver, so it’s an equally good connection test and a much better quality test.
Other Print Center commands worth knowing
Print Center does more than print test pages. A few of its commands help when you’re testing or troubleshooting a printer (Apple Support):
- Set the default printer. Select the printer in the sidebar and choose Printer > Use as Default, so documents go to the right printer when you print without checking the dialog.
- Check supplies and settings. Select the printer and choose Printer > Options & Supplies to see the driver details, supply levels on printers that report them, and the maker’s utility if one is installed.
- See what already printed. Choose Window > Completed Jobs to see the documents you’ve printed, with the date and time. It’s a quick way to confirm that a test page or document actually reached the printer.
- Print by dragging. Choose Printer > Add to Dock, then drag a PDF or image onto the printer’s icon in the Dock to print it straight away. Dragging one of our test page PDFs onto it is a fast way to print a test.
- Remove an old printer. Select it and choose Printer > Remove Printer. Removing duplicate or outdated entries avoids sending jobs to a printer that no longer exists.
Older versions: macOS Ventura and earlier
Before Print Center, each printer had its own queue window. On macOS Ventura 13, open System Settings > Printers & Scanners and click the printer in the list; from there you can open its Print Queue and its Options & Supplies (Apple Support). On macOS Monterey 12 and earlier, the same settings are under System Preferences > Printers & Scanners.
Apple’s help pages for these versions don’t describe a test page command, so the simplest test is the one at the top of this page: open it in Safari, choose a sheet and select Print now.
Use your printer maker’s utility
Many printer drivers for macOS add a utility with maintenance tools. Open System Settings > Printers & Scanners, select the printer, click Options & Supplies, and look for a Utility tab with a button to open the printer utility. Epson, for example, uses this route for its nozzle check and head cleaning (Epson Support), and Canon has its own IJ Printer Utility with a nozzle check pattern (Canon manual). These utilities are the Mac equivalent of a printer’s self-test page: they show whether the print head and inks are working.
Printers set up with AirPrint and no extra software may not have a utility at all. In that case, use the printer’s own control panel for its self-test, as described on our HP, Epson, Canon and Brother pages.
When the test page doesn’t print on a Mac
Apple’s printing troubleshooting guide suggests these checks, roughly in this order (Apple Support):
- Check the connection. A USB printer should be plugged in and turned on. A network printer must be on the same network as your Mac, and with several printers on a network, make sure you picked the right one.
- Check the printer. Look for error lights, jammed paper, low ink or toner and loose cables.
- Resume the queue. Open Print Center from the Dock. If a Resume button appears, click it. If a job with an error is blocking the queue, select it and click Delete Job.
- Try another app. Print from TextEdit. If only one app fails, the problem is that app or its settings.
- Update the printer software. In Printers & Scanners, click the printer to see its driver version, and install the latest software from the manufacturer if needed.
- Turn off print dialog extensions. In Printers & Scanners, click the printer, then Options & Supplies, select Use Generic Printer Features and click OK.
- Add the printer again. Click Add Printer, Scanner, or Fax and add it as a new queue. Once the new one works, delete the old one.
- Reset the printing system as a last resort. Control-click in the printer list and choose Reset Printing System. This removes every printer and its presets, so you’ll need to add them again.
When the test page prints but documents don’t
If the test page prints but a document doesn’t, the Mac and printer are talking, and the cause is usually one app, a paused job or the printer selected in the print dialog. Our guide for a printer that prints a test page but nothing else covers each cause on both Mac and Windows.
Print a quality test page from your Mac
The test page from Print Center checks the connection. To check print quality, print a sheet from the tool at the top of this page:
- In the print dialog, check that Scale is 100%, and that the paper size matches your tray, Letter or A4.
- Choose plain paper as the paper type and the normal quality.
- Click Printer Info in the print dialog if you want to see supply levels first; Apple describes this as the way to check ink or toner from any app.
When the page comes out, measure the 1 in and 2 cm bars at the bottom. If they’re right, your Mac printed at full size. If you see lines, missing colors or blur, the printer problem diagnosis tool will help you find the cause.